Thursday, 26 September 2013

Wipe Down Apron Tutorial

While the aprons I made previously in 'The Crafting Begins!" are lovely and pretty, they are not wipeable which really is essential if you don't want to stick them in the wash everyday.

So here are my new Wipe Down Aprons!


What You Need:

Oil Cloth
Contrast Fabric
Sewing Machine
Iron 

Method:

Cut your desired shape out of the oil cloth


Cut enough length to edge your apron, you may need two or three strips. Make the strips 3inches wide. 


Now take your strips, iron the whole length in half long ways, then iron each edge into the middle. 


Now fold in half and iron, so you are left with a smooth, fray free finish. 


Slide the edge of your apron between the binding made and pin securely all the way round. 


Machine sew all the way around. 


For the straps and neck tie, repeat the binding stage, cut out more fabric and iron as before, now sew down the length and cut to appropriate length. Sew onto the desired area.  

You can make a pocket and edge it to add to the apron if you wish. 


Finished Apron! 

Taggy Giraffe Tutorial

So I was asked to make a toy for a 4 month old baby girl and this is what I came up with...


Meet Taggy Giraffe, SO simple but incredibly exciting for a four month old, I used contrasting colours and fabrics for each side, different sizes and textures of ribbons and it also has a cheeky squeaker in its bottom! (I tried putting a bell in also but with all the stuffing it made a funny noise, so I took it out).


Before making this one myself I looked around online, and there was not one tutorial that I found helpful so I am going to write all you readers one.

Taggy Giraffe Tutorial 

What You Need:

Two contrasting fabrics
An assortment of ribbons
Sewing Machine
Squeaker
Washable stuffing 
Needle and Thread

Method:

Start by drawing out your shape, I would include one, but it is such a simple shape, cut out your template. Pin the template to your two pieces of fabric, cut out, leaving a seam allowance as you go. 


On the right side of ONE piece of fabric, pin your selected ribbons, make sure none fray. 


Machine stich the ribbons in place, snip the excess ribbon and remove the pins. (This will make it easier to turn through). 


Now pin right sides together. 


Machine stitch all the way around, leaving a small gap in the neck to turn through later, make sure to reverse stitch around the opening. 


Snip excess fabric for a smoother shape.


Turn through, make sure to push out the head shape and feet properly. 


Start to insert your stuff, making sure to push it right into the head and feet, you may need a little extra stuffing to make the neck not flop! (You can add safety eyes here if you want but I think it looks sweeter without them).


Now you can put the squeaker anywhere you want, but my cheeky giraffe has his in his bottom, make sure to pop this in before you finish stuffing. 

Pin shut the opening, and slip stitch very securely. (There is a very good tutorial here http://www.youtube.com/watch?v=i20WGQRlnIA if you don't know how to already)


And the finished result!


Please leave a comment or pictures if you have made a Taggy Giraffe x

Monday, 23 September 2013

Retro Cupcakes...

So I know in a previous post I may have had a little bit of a rant about cupcakes and their un-originallity.
I am about to eat my words because, my sister and I just made these...

Retro Cupcakes


We were commissioned make make 28 cupcakes for a 9 year old girl...who hated pink! But we love a challenge so we came up with these, retro heels for the girls and flying sherbet saucers for the boys! 


We also make a GIANT cupcake with a sparkler for the birthday girl! 


For Those Cold Winter Days...

For those cold winter days, poorly tummies or just to relax...everyone needs a 'Wheatbag'. My sister is a figure skater and she has always had one to soothe those aches and pains.

Unfortunately on a recent visit to me, I may or may not have burnt the corner of her beloved 'Wheatbag' in my very old microwave, as a result it started to leak wheat. So with my new snazzy sewing machine, I decided to make her a new one.

I didn't follow a pattern or tutorial for this, it was super easy and literally took me half an hour; but I will give you a quick lesson.


You can make them any size you want, I plan on making some mini ones that you can slip into wellies or coat pockets and also pop into the freezer to use as a cold compress. 

You will need:

2 pieces of your chosen fabric (same size)
The same amount of towelling or fleece as your chosen fabric
Wheat, Rice or Lentils 

Method: 

Lay your fleece or towelling on the wrong side of your fabric, sew all four edges. Repeat with second piece of fabric. 

Now with your 2 pieces of fabric right sides together, sew three of the four sides. 

Now turn right sides out, you should have a little towelling/fleece lined bag. 

As you can see in the picture in above, I have sewn two lines, splitting the bag into three, this just stops all the grains moving around too much. 

Now fill each section with your chosen filling , fold the ruff edges at the top into the bag and iron in place, now stitch the top closed, do two rows of sticking to make sure no filling leaks out. 

TA-DA your finished! You can pop it in the microwave to heat up!


The Crafting Begins!!

So at the beginning of December my Mum and I like to have a table at the local craft fair, to raise money for a chosen charity (She makes silver and gold jewellery) . This year, I have a little time off work, so naturally I am going craft crazy!

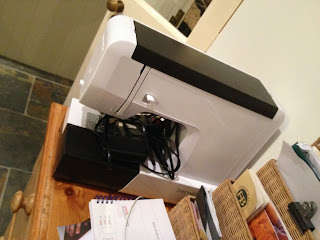
It all began with my new sewing machine...


It's a 'Bernette' machine and I can not sing its praises high enough because for years I have been working on a dysfunctional 'Brother' machine. I love the design because I am a self confessed tidy and clean freak, and this machine has NO visible buttons or controls its all hidden away! 

Anyway, I started by making girls ruffle aprons, using this AMAZING tutorial: 

http://www.annkelle.com/Urban%20Zoology/2013/07/apron-tutorial.pdf

Here is my finished product, 


They are machine washable and so handy to have around the house, I ended up making three of these, in different sizes and fabrics, 

Here is one I did in Pink, please excuse the crumples, I haven't had a chance to iron it yet! (Personally I prefer the blue)


There will be new daily crafts, so keep checking back! 


Sunday, 22 September 2013

Top 4 Activities for Rainy Days...

For those rainy days when you just need...something... to do, I have composed a list of my top five favourite activities;

1. Sensory Bags

Children of all ages absolutely love these, you can make them any colour, any texture and put anything in them.


Ingredients:

STRONG sandwich bags
Duct Tape or Parcel Tape
Hand gel (can use hair gel but is smelly and sticky) 
Colouring 
Glitter etc for filling 

Method: 

Firstly squeeze your desired gel into the sandwich bag, add colouring and glitter. 
Seal the top
Fold over top and seal with tape. 

Let your child squeeze the gel and glitter around, it will eventually even out. 

These are so great you can make them with anything:

Spaghetti Sensory Bags


Glow in the Dark Sensory Bags (for this use glow in the dark paint or the insides of glow sticks)


SAFTEY: If a bag splits, dispose of it and make a new one. You can tape all the edges just to be extra safe, but especially if using glow sticks as this can be toxic. Always supervise play)


2. Masking Tape Roads

It really is that simple, all you need is masking tape and cars!


Just tape out your roads, you can even make Lego houses, shops and car washes! 

3. Homemade Flubber

Again like all my activities, this is really easy to make!


It has such a wonderful texture that is different from play-dough or sand, children love playing with this and its so quick to make. 

Ingredients: 

3/4 of a cup of cold water
1 cup of PVA glue
food colouring
1/2 hot water
1 teaspoon of Borax (Sodium Borate can find in laundry aisle) 

Method: 

In a bowl mix the food colouring, glue and cold water. Set this bowl aside.
In a new bowl mix the Borax and hot water until dissolved. 
Slowly mix the glue mixture into the Borax and water. 
Tip out excess water. 

4. Spy Game

Now this one involves string and LOTS of it, so it is one that absolutely must be supervised and maybe saved for slightly older children. 


Place lots of lengths of string across a hall or a room to make this obstacle course (use masking tape as it doesn't leave a mark on walls etc), give your children stopwatches or a stop clock and they will be amused for hours. You can even dress up as spies or plant treasure at one end, the possibilities are endless. 

So those are my personal top five, please comment and let me know if you use them and how you get on! 


Ice Cream Cone Cupcakes....


Cupcakes have now been so fashionable for so long...does anyone else agree that they are loosing their touch. Everyone 'decorates' cupcakes nowadays. So when I was asked to make a little boy some cupcakes recently, I almost sighed and rolled my eyes but instead I looked at this as a new challenge.

With the help of my very talented sister, this is what I came up with...Rocket Cupcake Cones!

They are so easy to make (I don't follow a recipe I just geusstimate, nannies don't have time for recipes!)

But here are some general guidelines on what I did to make about 12 Cupcake Cones:

6oz Butter/ Margarine (can also use with dairy free)
6oz Sugar
6oz Self Raising White Flour
3 Eggs

Soften the butter in a mixing bowl with a wooden spoon, mix in the sugar.
Make a dent in the centre of the mixture and crack in the three eggs. Mix together.
When mixture is smooth, fold in the flour using a metal spoon.
(You can add flavourings or colourings here if you wanted too, I just added a little vanilla extract)

Put your *flat bottom* Ice Cream cones on a baking tray.

(Now I have seen some people buy disposable deep roasting tray, turn it upside down and cut circles out to hold the cones. But I haven't toppled any over yet, so I just stand them on the baking tray!)

Spoon the mixture into the cones, fill the cones about 2/3 of the way for a perfect round top.

Place in over for approx. 15-20 minuets, but check regularly towards the end.

Note: I do all my cooking in an AGA if you are using a conventional oven, adjust temperature and timing appropriately.

Now you can decorate how you wish, I made these into rockets but we have also made them into 99 Ice Cream Cones with a chocolate flake!


Where it all began...Life as a trainee Norland Nanny...


I felt like harry potter upon receiving my Norland acceptance letter in the post (almost three years ago) with the prestigious ‘N’ stamped on the front. After a…different… interviewing process than I had ever experienced before, in which I was required to read a children’s book to my interviewers as if they were children, I was delighted to be accepted.

Not many 18-year-old students have the media interested in their every move, or daily mail online readers criticising their looks or training, nor do they have to prepare polished shoes, immaculate white gloves and a freshly brushed hat on their first day. I however had to deal with all of these things, and the pristine uniform is not just expected on your first day, but every day after for the duration of your training.


Over my two years in bath I must have used an inordinate amount of bobby pins, hairspray and hairnets in order to wrestle my waist length hair into a neat and frizz free bun every day (me-centre). While the majority of my friends were at various universities, partying drinking and sleeping in, I was setting my alarm for 6.30, ironing uniform and preparing children’s menu and activity plans. But I have loved every minute, this blog will be full to bursting with, recipes, sewing tutorials, little nanny hints and tips and an insight into life as a Norland Nanny.